The Anatomy of Blue Flame and Pipe Thread
You can hear a bad gas line installation before you smell it. It’s not always a dramatic hiss; sometimes it’s the high-pitched whistle of a starved manifold, or the metallic clatter of a furnace struggling with dynamic pressure drop because some utility-closet warrior ran half-inch corrugated stainless steel tubing (CSST) over a fifty-foot stretch where they needed one-inch black iron. I have spent more than thirty years in freezing basements and sprawling commercial mechanical rooms, and if there is one thing that gets my blood pressure up, it is seeing gas piping treated like garden hose. When you are dealing with natural gas or propane, there is zero margin for error. A single microscopic void in a joint compound, or a failure to run a proper pressure test, transforms a heating system from a source of winter comfort into a dormant hazard.
For this technical breakdown, we are looking at the cold northern climate zone where a furnace is not an appliance—it is a life-support system. In places like Chicago or the Northeast, when the temperature drops to single digits, a cracked heat exchanger or a fuel delivery failure is an immediate emergency. We will unpack the exact physical steps, structural demands, and testing protocols required to feed fuel safely to your furnace. If you want to understand how a high-efficiency heating system is truly integrated, explore our heating service innovations transforming 2025 climate control.
“Gas piping must be sized to provide a sufficient quantity of gas to meet the maximum demand without undue loss of pressure between the point of delivery and the appliance.” – International Fuel Gas Code (IFGC) Section 402.1
The Physics Lesson: Why Pressure Drop Will Starve Your System
My old mentor, an absolute monster of a tech who could identify a faulty thermocouple by the sound of the gas valve clicking, used to grab my shoulder and scream, “You can’t burn what you can’t deliver!” He was talking about fuel volume, but it applies to airflow and piping alike. He would watch green apprentices try to solve a combustion problem by adjusting the gas valve’s regulator, when the actual issue was that the gas line was choked down five fittings back. If the line is undersized, the moment the gas valve opens and the manifold calls for fuel, the dynamic pressure drops off a cliff. The burner flames turn lazy and yellow, soot starts building up on the heat exchanger, and you end up with incomplete combustion. That yellow flame isn’t just inefficient; it is actively producing carbon monoxide (CO), the silent killer that every experienced technician respects.
Before a single length of pipe is cut, we have to calculate the total input rating of all gas appliances on the line, measured in BTUs per hour. This is where a proper duct design services review and building load analysis come into play. If your house has a 100,000 BTU furnace, a gas water heater, and a commercial-grade kitchen range, you cannot simply tee off the existing line and hope for the best. Every elbow, tee, and valve adds equivalent length to the run. If the pressure drops too low, your furnace will suffer from flame rollout or frequent ignition failures, leading to costly emergency calls. You can read more about avoiding these common furnace pitfalls in our guide on furnace repair myths debunked by industry experts.
The Blueprint: Step-by-Step Gas Line Installation Mechanics
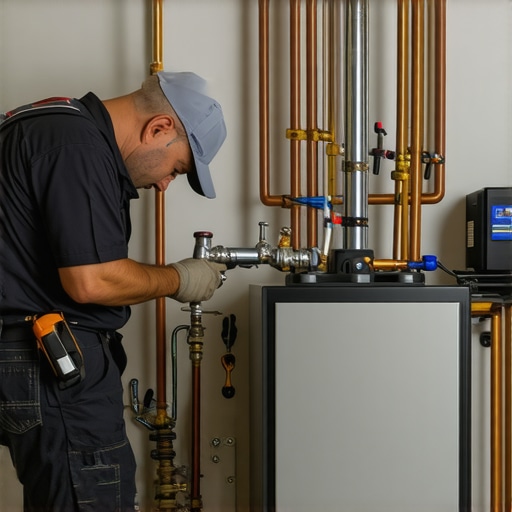
To safely run gas to a modern condensing furnace, you must follow a rigid physical sequence. The process cannot be rushed, and it cannot be bypassed with cheap shortcuts. Here is how a professional, veteran HVAC technician executes a gas line run:
- Step 1: Material Selection and Threading. We use Schedule 40 black iron pipe for most structural runs. Every cut must be clean, deburred, and threaded with precision dies. A burr left inside the pipe creates turbulence in the gas flow and can catch particulate matter over time.
- Step 2: Joint Compound Application. We do not use standard white Teflon tape. We use specialized, gas-rated yellow PTFE tape or high-quality pipe dope (joint compound) approved for natural gas and LP. The dope must be applied only to the male threads, leaving the first two threads bare so that excess compound does not squeeze into the pipe and clog the gas valve’s internal screen.
- Step 3: Installing the Sediment Trap (Dirt Leg). This is where you spot the amateurs. Before the gas line enters the furnace gas valve, you must install a tee with a nipple and a cap extending straight down. This is the sediment trap. Gas isn’t perfectly clean; it carries moisture, scale, and pipe shavings. Gravity pulls these contaminants down into the trap before they can reach and destroy the delicate internal diaphragm of the gas valve or spark igniter.
- Step 4: Shut-off Valve Placement. An approved, manual gas shut-off valve must be installed within six feet of the furnace, ahead of the sediment trap, in an easily accessible location. If there is a fire or a component failure, you must be able to cut the fuel instantly without searching for a wrench.
- Step 5: The Union Connection. You must install a ground-joint union between the shut-off valve and the furnace. This allows the furnace to be disconnected and serviced in the future without cutting or unscrewing the entire gas line run.
“The sediment trap shall be installed as close to the inlet of the appliance as practical and shall be ahead of all other controls.” – NFPA 54 / National Fuel Gas Code
The Pressure Test: Verifying Structural Integrity
Once the black iron is assembled and tightened with heavy-duty pipe wrenches (and yes, we use two wrenches to avoid twisting the internal manifold of the furnace), we test. You never, under any circumstances, test a gas line for leaks using an open flame. I have seen old-timers brag about using a lighter to find leaks, and those are the same guys who ended up with no eyebrows or worse.
We isolate the furnace gas valve first, as applying high test pressure directly to the valve’s low-pressure diaphragm will ruin it instantly. We pump the line up with compressed air to at least 1.5 times the maximum working pressure (usually around 3 to 5 PSI for residential lines, though local codes often require 10 to 15 PSI for a set duration). We use a calibrated pressure gauge and monitor it over a minimum of 15 minutes. If that needle moves even a hair, there is a micro-leak. We then brush every single joint with a high-viscosity leak detection solution (soap bubble test). A leak will present itself as a growing cluster of tiny, dense bubbles. If a leak is found, the line must be depressurized, disassembled, cleaned, re-doped, and re-tested. There are no quick fixes like wrapping tape around the outside of a leaking joint.
Integrating Control Systems and System Optimization
Once the fuel lines are certified liquid-tight and gas-tight, we focus on the controls. A safe furnace installation requires reliable communication between the gas valve, the safety limits (like the flame sensor and high-limit switch), and the thermostat. Modern homes in cold climates benefit enormously from a smart thermostat setup or advanced app-controlled heating systems that can monitor system run times and alert you if the heating cycle is abnormal. If your furnace is short-cycling, it could be a sign of a safety switch opening, which demands immediate diagnostic attention. Learn more about identifying these critical system signals in our article on how to identify when furnace repair is urgent and why.
Furthermore, standard furnaces in tightly sealed homes can cause indoor air quality issues or dry out the air. That is why we recommend pairing your heating system with heat recovery ventilators to introduce fresh outdoor air without losing thermal energy, alongside whole-home humidifiers to maintain comfortable moisture levels during the harsh winter months. For schools or commercial spaces, keeping up with regular school boiler maintenance and high-capacity heating diagnostics ensures that these heavy-duty systems operate safely and within emissions standards. If you are ever in doubt about the health of your existing furnace, gas valves, or electrical components, scheduling a transformer replacement or a professional inspection is the smartest preventative step you can take. For more professional advice on maintaining a reliable system, check out our guide on preventative HVAC repair tips for year-round efficiency.