
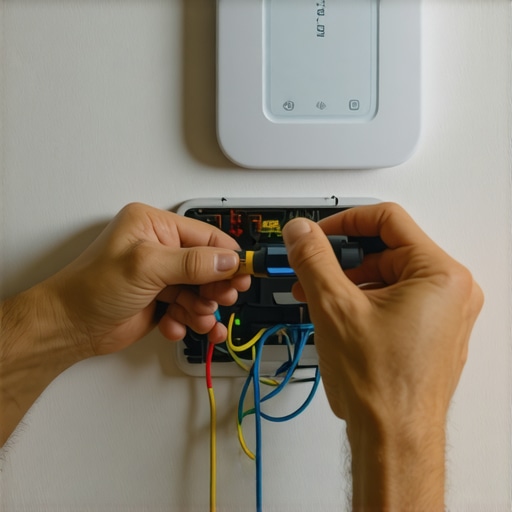
The Simple Wiring Fix for a Smart Thermostat That Won’t Turn On
You’ve done the research, compared the features, and finally spent a couple of hundred dollars on a sleek, high-tech Nest or Ecobee smart thermostat. You followed the instructions, mounted the wall plate, and snapped the device into place, expecting to see a glowing setup screen. Instead, you’re greeted with a cold, black rectangle. The screen won’t turn on, and your HVAC system is unresponsive.
As an electrical technician specializing in smart home automation and building control, I see this scenario play out more often than you might think. It is incredibly frustrating to invest in home improvement only to be met with a device that feels like a “brick” right out of the box. However, in about 90% of these cases, the thermostat isn’t defective. The issue lies in a fundamental misunderstanding of how modern digital controls receive power compared to the old-school mercury or battery-operated units they replace. In this guide, I’m going to walk you through the professional troubleshooting process, focusing on the “simple fix” that usually solves the problem in under fifteen minutes.
Why Your Smart Thermostat is Staring Back with a Blank Screen
To understand why your thermostat won’t turn on, we have to look at the evolution of HVAC controls. Older thermostats were essentially simple switches. When the house got too cold, a bimetallic coil or a drop of mercury would complete a circuit, sending 24 volts of electricity to your furnace to tell it to start. These devices required very little power to operate; many ran for years on a couple of AA batteries or didn’t require external power at all.
Modern smart thermostats are entirely different beasts. They are essentially small computers mounted on your wall. They have full-color LCD screens, powerful processors, and – most importantly – WiFi radios that stay constantly connected to your home network. This level of functionality requires a steady, uninterrupted stream of 24V AC power. While some models claim they can “power steal” (drawing small amounts of electricity from the heating or cooling wires when the system is running), this is often insufficient for modern high-performance units. When the power draw exceeds what the wires can provide, the internal battery dies, and the screen goes dark.
Before you assume your unit is broken, it’s vital to understand that Choosing the Right HVAC Fixes: What Homeowners Need to Know involves recognizing that digital hardware requires digital-grade infrastructure. If your home’s wiring was designed for a 1995 dial-style thermostat, it likely isn’t ready for a 2024 smart controller without a few minor adjustments.
The “C-Wire” Mystery: What It Is and Why You Need It
If you have spent any time looking at your thermostat’s wiring, you have likely heard the term “C-wire” or “Common wire.” This is the single most important component of a smart home HVAC setup. To understand the C-wire, think of a standard electrical circuit. You need a “hot” wire to bring the electricity in and a “neutral” or “return” wire to take it back to the source, completing the loop.
In an HVAC system, the R-wire (usually red) is the hot wire, providing 24V power from the transformer in your furnace. However, without a C-wire (Common), the circuit has no return path. The thermostat can send power to the heater (W) or the AC (Y), but it cannot easily tap into that power for its own internal needs without completing a dedicated loop back to the transformer. This is why many homeowners encounter the dreaded “battery needs to be recharged” error message on their Nest or Ecobee even when the device is physically plugged into the wall. Without that common wire, the device is essentially starving for energy.
The C-wire provides a continuous 24V circuit that keeps the thermostat’s WiFi and screen running 24/7, regardless of whether your heat or air conditioning is currently active. If your thermostat won’t turn on, the absence or improper connection of this wire is almost certainly the culprit.
Step 1: The Wall Plate Inspection (The Most Common Oversight)
Before we head down to the furnace, we need to start with the basics. It sounds simple, but a wire that isn’t fully seated is the leading cause of “dead” thermostats. Smart thermostat terminals use spring-loaded “push-to-insert” connectors. If the copper wire isn’t inserted at the correct depth or angle, the connection won’t be made.
- The Button Test: Look at the small tabs or buttons on your thermostat’s wall plate. When a wire is properly inserted, the button should stay depressed. If the button for your R or C wire is popping back up, the wire isn’t locked in.
- The 3/8 Inch Rule: For a secure connection, the copper wire should be stripped to exactly 3/8 of an inch. If the strip is too short, the terminal grips the plastic insulation rather than the metal. If it’s too long, you risk a short circuit.
- Check for Corrosion: If you are in an older home, the copper may be oxidized (turning green or black). Use a bit of sandpaper or a fresh snip of the wire to reveal shiny, new copper.
If you’ve confirmed the wires are physically secure but the device still won’t boot, you might be dealing with Solving WiFi Connectivity Issues with Your HVAC Control Board, which often starts with a lack of consistent power at the terminal level. Ensure that your R wire is in the ‘Rh’ or ‘Rc’ slot (usually bridged) and your C wire is firmly in the ‘C’ slot.
Step 2: The Hidden Fix – Checking the HVAC Control Board
This is the “Simple Fix” I promised. Many homeowners look at their wall and see five wires: Red, White, Yellow, Green, and Blue (or Cyan). They connect the Blue wire to the ‘C’ terminal on the thermostat and… nothing happens. Why? Because while the wire exists in the wall, it is often not connected at the other end inside your furnace.
When HVAC technicians installed systems twenty years ago, they often pulled a 5-wire cable but only hooked up the four wires needed for a basic thermostat. The fifth wire (the potential C-wire) was simply tucked away, unused. To fix this, follow these steps:
- Power Down: Turn off the breaker to your HVAC system. This is non-negotiable.
- Open the Furnace: Remove the service panel on your furnace or air handler. You may need to unscrew a couple of hex-head screws.
- Locate the Control Board: Look for a circuit board where all the thermostat wires terminate. You will see a strip of screws labeled R, W, Y, G, and C.
- Check the C-Terminal: Look at the ‘C’ screw. Is there a wire attached to it? If you see a stray blue wire wrapped around the main cable bundle, that’s your fix! Unwrap it, strip the end, and secure it under the ‘C’ screw terminal.
- The Fuse Check: While you are looking at the board, look for a small automotive-style blade fuse (usually 3-amp or 5-amp, colored purple or orange). If you accidentally touched wires together during installation, this fuse may have blown. If the filament inside is broken, your thermostat will never turn on until that $2 fuse is replaced.
This step is critical because Identifying a Failed Control Board vs a Broken Igniter requires knowing if your board is even receiving and distributing power. If the ‘C’ terminal is empty at the furnace, your thermostat is trying to draw power from a wire that leads to nowhere.
No C-Wire? Three Professional Workarounds
If you opened your furnace and discovered that you only have four wires (or fewer) and no spare wire tucked away, don’t panic. You don’t necessarily need to pull new wires through your walls. There are three professional-grade workarounds:
1. The Add-a-Wire Kit (Power Extender)
Manufacturers like Ecobee include a “Power Extender Kit” (PEK) in the box. Nest offers a similar “Nest Power Connector.” These devices are installed at the furnace and use clever multiplexing to send power and control signals over the existing wires. This is the cleanest and most reliable DIY solution for homes without a C-wire.
2. The G-to-C Bridge
If you don’t want to buy a kit, you can repurpose your Fan (G) wire as a C-wire. You move the wire from ‘G’ to ‘C’ at both the thermostat and the furnace. The Catch: You will lose the ability to run your fan independently (the “Fan On” setting). Your fan will still run automatically when the heat or AC is on, but you lose manual control. This is a common “quick fix” used by technicians in a pinch.
3. External 24V Transformer
If you are in an old home with only two wires (Heat only) and no way to access the furnace control board, you can buy a plug-in 24V transformer. You plug it into a standard wall outlet and run the two thin wires to the ‘C’ and ‘Rc’ terminals on your thermostat. It’s not the most aesthetic solution, but it provides the dedicated power modern smart thermostats crave.
Sometimes, these workarounds can get complicated, and there are The Specific Reasons Your HVAC Tech Just Told You to Call a Licensed Electrician – especially if your system uses high-voltage (120V or 240V) baseboard heaters, which will instantly destroy a smart thermostat if connected directly.
Safety First: Avoiding Short Circuits During DIY Repair
Working with 24V systems is generally safe for DIYers because the voltage is too low to give you a dangerous shock. However, it is plenty of voltage to “fry” sensitive electronics. The most common mistake I see is homeowners changing a thermostat without turning off the breaker. If the R (hot) wire touches the C (common) wire or the metal chassis of the furnace, it creates a direct short.
This short circuit will instantly blow the transformer or the fuse on the control board. If you’ve followed all the wiring steps and the screen still won’t turn on, you may have inadvertently caused a short. Always use a multimeter to check for 24V AC between the R and C wires at the wall. If you get 0V, go back to the furnace and check that fuse.
Furthermore, be aware of The Hidden Electrical Hazards in Your Older HVAC System. Old wiring can have cracked insulation or brittle copper that snaps when you try to bend it into a new terminal. If the wires look scorched or the insulation crumbles in your hand, stop immediately and call a professional.
Conclusion & Final Checklist
A smart thermostat that won’t turn on is almost always a victim of a broken circuit. By ensuring you have a dedicated 24V return path via a C-wire, you can bring your device to life. Once you get the power flowing, don’t forget to learn How to Calibrate a WiFi Thermostat for Better Accuracy and Comfort to ensure your new investment is actually saving you money on your energy bills.
Your Final Troubleshooting Checklist:
- Confirm the HVAC breaker is ON.
- Ensure the R and C wires are stripped to 3/8″ and fully seated.
- Verify the C-wire is actually connected to the ‘C’ terminal on the furnace control board.
- Check the 3A or 5A fuse on the HVAC control board for signs of failure.
- If no C-wire exists, install a Nest Power Connector or Ecobee PEK.
If you have followed these steps and your screen remains a stubborn black void, there may be a deeper issue with your transformer or the thermostat itself. At Heat Pros Services, we specialize in bridging the gap between traditional HVAC and modern smart home technology. Don’t hesitate to reach out for a professional diagnostic if your DIY journey hits a dead end.